

Putting in tile edge trim could appear as a small part of tiling tasks. Yet, it holds an important place in how things look and hold up. Have you noticed cracked tile edges or bumpy changes? Most likely, the trim was missing. Or it was put in badly. For a sharp, expert style, you need to grasp the proper supplies, gear, and method.
Materials and Tools for Installing Tile Edge Trim
Essential Materials for the Project
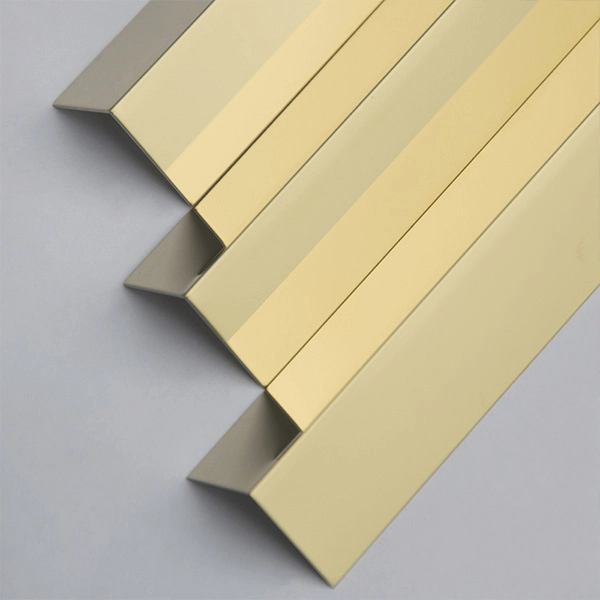
First off, select your tile edge trim wisely. Typical picks are metal trim molding and aluminum extrusion profiles. They deliver a tidy ending and shield bare edges from hits or wetness. Aluminum won’t rust in moist settings. Just the outside layer turns to make a guard coat. So, in wet inside rooms such as kitchens or on bright outside patios, aluminum screens hold their first shade and state for quite a while. And they don’t wear out easily.
You also need these materials:
- Tile adhesive suitable for both your tile type and substrate.
- Grout or caulk for sealing joints. Choose based on whether the area needs rigidity (grout) or flexibility (caulk).
Tools Required for Installation
Grab a few simple tools for the job:
- Measuring tape and pencil to ensure accurate planning.
- Notched trowel to apply adhesive evenly.
- Tile spacers for uniform gaps.
- Tile cutter or utility knife to trim tiles as needed.
- Caulking gun and a smoothing tool or sponge for final sealing.
Step-by-Step Process to Install Tile Edge Trim
Measuring and Planning the Installation Area
Begin with sizing up every edge that calls for trim. That covers outer corners, switches to different stuff, or finishes of tile rows. Draw lines on these spots using a pencil. Then you get straight guides to match up.
Applying Adhesive to the Surface
Lay out tile adhesive in a smooth layer with a notched trowel. Keep your eye on the spot for the trim. Make certain it covers all to stop holes that might loosen the grip.
Placing the Edge Trim in Position
Line the trim up with attention on your drawn lines. Push it down into the adhesive base. Check that it’s even with the tile face and level down its full run. This action sets how nice the end looks.
Using Tile Spacers for Consistent Gaps
Slide tile spacers in between the trim and next tiles to keep distances the same. And this keeps grout paths in line with your whole setup.
Allowing Adhesive to Set Properly
Stick to the maker’s rules on cure time. If you bump the trim early, before the adhesive hardens, it might go off-kilter or stick poorly.
Removing Spacers Before Sealing Joints
When the adhesive firms up, pull spacers out softly. Do so without nudging tiles or the trim. Grab a utility knife if glue hardened near them.
Applying Grout or Caulk Along Edges
Put grout on firm wall joins where no motion is likely. Go with caulk at corners or spots open to stretch, like wall-to-floor spots. Choose a shade that mixes nicely with your tile or trim.
Smoothing Out the Sealant Material
Take a smoothing tool or wet sponge to shape the sealant cleanly. Have it rest a tad under tile height. Yet fill the join right up for solid seal.
Letting the Grout or Caulk Cure Completely
Allow it all to harden before you use the space. This counts extra if water hits it. The wait might run 24–72 hours. It hinges on the item’s kind and room dampness.
Important Considerations During Installation
Selecting Appropriate Tile Type and Size
Not every tile pairs fine with all edge trim types. Your tile’s bulk and stuff ought to fit the inside span of the trim shape you pick.
Choosing the Right Trim Material
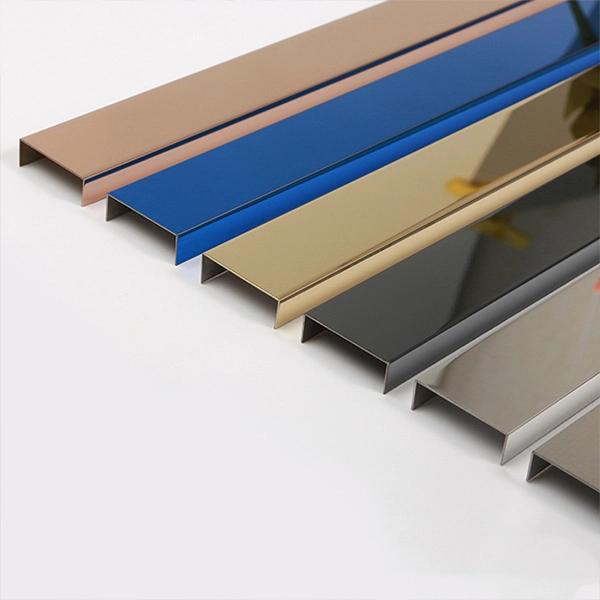
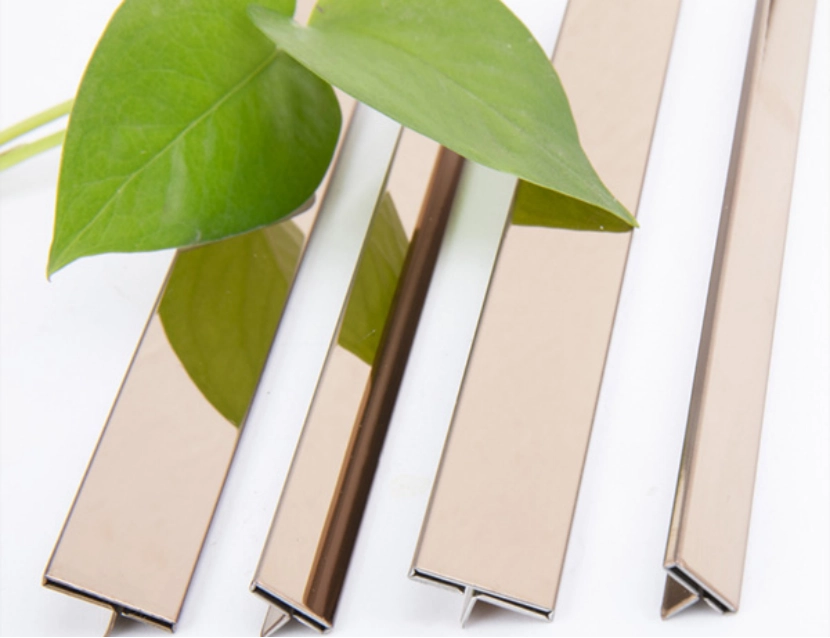
Metal trims shine for lasting well. We offer custom-made architectural trims, primarily for finishing and embellishing high-end interior hard finishes. For spots prone to damp like showers or backsplashes, stainless steel or aluminum are preferred for corrosion resistance.
Matching Color and Finish with Tiles
Let your trim match the tile shade and texture. With dull tiles in use, a rubbed metal trim fits better than a shiny version.
Picking a Suitable Trim Profile Shape
Trims show up in square edge, round edge, or pretty forms. Square edge trims give a crisp, up-to-date streak. Meanwhile, round edges ease the shifts.
Evaluating Installation Location Needs
Ponder the tile’s spot. Damp-heavy areas call for trims that resist rust. Aluminum extrusion profiles are ideal here. Aluminum alloys are lightweight, easy to process, and corrosion-resistant, making them a commonly used material in decorative engineering.
Deciding Between Adhesive or Mechanical Fasteners
Many trims join via tile adhesive by itself. But for tough-pressure zones or rough bases, mechanical fasteners might be necessary.
Ensuring Accurate Cutting and Placement of Trim Pieces
Use a fine-tooth hacksaw or specialized trim cutter to get clean edges without damaging the finish.
Determining Whether Grout or Caulk is More Suitable
Go for grout in spots wanting a firm, stiff link. Turn to bendy caulk where bits might nudge a touch as years pass, like floor shifts.
Applying Proper Sealing Techniques if Needed
If metal trims go in wet areas, you may need to seal to dodge rust after long exposure.
Planning for Long-Term Maintenance Requirements
Pick trims simple to wipe and free from dulling as time goes. Aluminum with anodized finishes is low-maintenance and durable.
Following Safety Guidelines During Installation Work
Wear gloves when cutting trims—metal edges can be sharp. Eye protection is also recommended when handling cutters or trowels.
Knowing When to Seek Professional Assistance
If angles at corners get hard to cut, above all with costly stuff like stainless steel, think of calling in a pro installer.
Optional Types of Metal Tile Edge Trims to Consider
Stainless Steel Trims for High-End Durability
V-Grooved Profiles differ from ordinary bends that create rounded or R-angled corners. We use a V-Cut process to treat the stainless steel before bending, giving it extremely sharp right angles. These trims are ideal for luxury bathrooms, kitchens, or commercial spaces requiring rust-proof solutions.
Aluminum Trims as Lightweight Alternatives
Aluminum is more budget-friendly than stainless steel and offers a broad range of finishes through anodizing or powder coating. Aluminum is highly ductile and can be extruded or bent into various patterns, offering flexibility in manufacturing processes.
About us
One notable manufacturer in this space is Inoxfurt Metal—a high-end custom supplier specializing in metal decorative components such as trims and architectural profiles. We offer precision V-grooving and CNC bending services to ensure tight tolerances and sharp finishes on custom orders.
Inoxfurt Metal stands out not just for quality but also for their ability to produce long-length trims—up to 5980mm depending on section design—ideal for commercial interiors where continuous lines are essential. Visit Inoxfurt Metal today and explore our range of durable, precision-crafted tile edge trims for a flawless finish!
FAQ
Q1: Can I install tile edge trim after tiling?
A: It’s best installed during tiling to ensure alignment and secure adhesion.
Q2: Should I use grout or caulk between tile and trim?
A: Use grout for rigid joints; caulk is better for flexible areas like corners.
Q3: What’s better—stainless steel or aluminum trim?
A: Stainless steel is more durable; aluminum is lighter and easier to cut.
Q4: How do I cut metal tile trims cleanly?
A: Use a fine-tooth hacksaw or mitre saw with metal blade for best results.
Q5: Do metal trims require sealing?
A: Not always, but sealing helps prevent corrosion in wet areas.